Lining up the Particles
As we discussed in the previous chapter, our Particles have a location, direction, speed, and radius. However, instead of spawning the Particles in a random location, we are going to create an evenly spaced grid of Particles.
Our project window is currently set to 800x600 so we will create a grid of 80x60 Particles. This will give us 10 pixels between each Particle for a total count of 4800. Previously, we used ParticleController::addParticles( int amt ) to populate our list. We are going to make a similarly named method that will lay the Particles out in a grid.
The addition of 0.5f is just a way to make sure the grid of Particles is centered on screen. Try removing the 0.5f to see the difference.
Inside the ParticleController constructor, we add a nested for-loop which will call addParticle( x, y ) 4800 times.

Since each Particle controls its own variables, we can create remarkably complex (looking) results by simply adding one or two additional instructions for the Particles to execute.
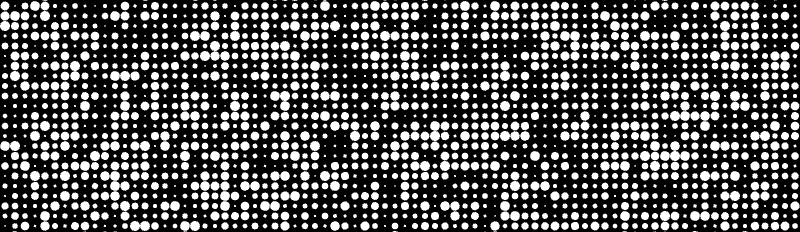
For example, if we wanted each Particle to have a random radius, we need only to add a single line of code. That is a deceptively powerful realization. One line of code is all it takes to modify the look of thousands of individuals.
Just to clarify, this is not a concept unique to Cinder. This is in no way a new or personal epiphany. As I continue to develop this tutorial, the project is going to become more and more complex. I find it useful to point out key aspects of my process regardless of whether they might be obvious or not. This notion of creating a large number of individual objects, each with its own interpretation of a single set of instructions, is what the majority of my code explorations are based upon.
Rand is a class that helps you create random numbers to your specifications. If you just want a random float between 0.0 and 1.0, you write:
If you prefer to get a random float in a weirder range, you can do this:
That will give you a random number between 5.0f and 14.0f. This also works for ints. And happily, you can do the same thing for 2D and 3D vectors. If you ask for a randVec2f(), you get a 2D vector that has a length of 1.0. In other words, you get a point located on a circle that has a radius of 1.0. If you use randVec3f(), you will get back a point located on the surface of a unit sphere.
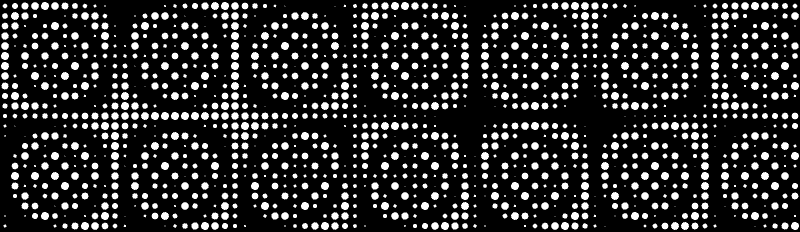
This process is pretty much how I learned trig. I read all about sine equals opposite over hypotenuse in college but I didn't appreciate the nature of trigonometry until I started experimenting with code. My early days of creating generative graphics was about 10% creative thinking and 90% "What if I stick sin(y) here? Hmmm, interesting. What if I stick cos(x) here? Hmmm. How about tan(x)? Oops, nope. How about sin( cos( sin(y*k) + cos(x*k) ) )? Oooh, nice!".
Incidentally, sin( cos( sin(y*k) + cos(x*k) ) ) looks something like this:
It is time to give our project some motion. We are going to use the same method that we used to oscillate the background clear color. getElapsedSeconds() and getElapsedFrames() are extremely useful for prototyping some basic movement.
Since we are calling this in our Particle class, we need to tell the Particle class where it can find getElapsedSeconds(). All we do is add this include line to the top of the Particle class.
Recreating the Image with Particles
In the last section, we learned three different ways to load and display an image. In this section, we are going to combine the image and Particle engine to hopefully create something greater than the sum of the parts.
We will start by replacing our gl::Texture with a new class, the Channel. This is a class which can be used for storing a grayscale image. Its name comes from the fact that its older brother, the Surface represents a color image made up of individual color channels: red, green, blue and sometimes alpha. However we don't need all that data for our purposes - we just want a gray image, so using a Surface is overkill. Also, although gl::Textures can be grayscale, we don't want to draw this image anymore - we want to get at its data. So instead of putting it on the graphics card, we want to store it in memory, which a Channel is ideal for.
Loading an image into a Channel is practically the same as loading into a gl::Texture.
It is the same as before except we create a Channel32f instead of the gl::Texture. The 32f simply means the Channel is made up of 32 bit floating point numbers. In this scheme, 1.0 represents white and 0 represents black.
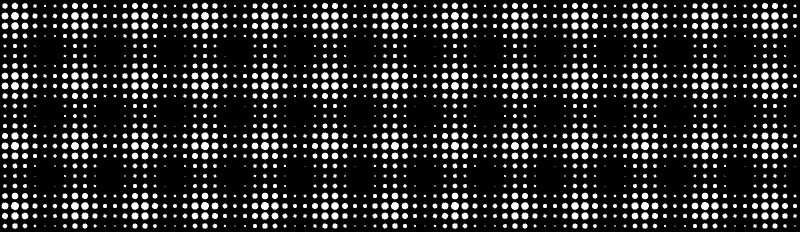
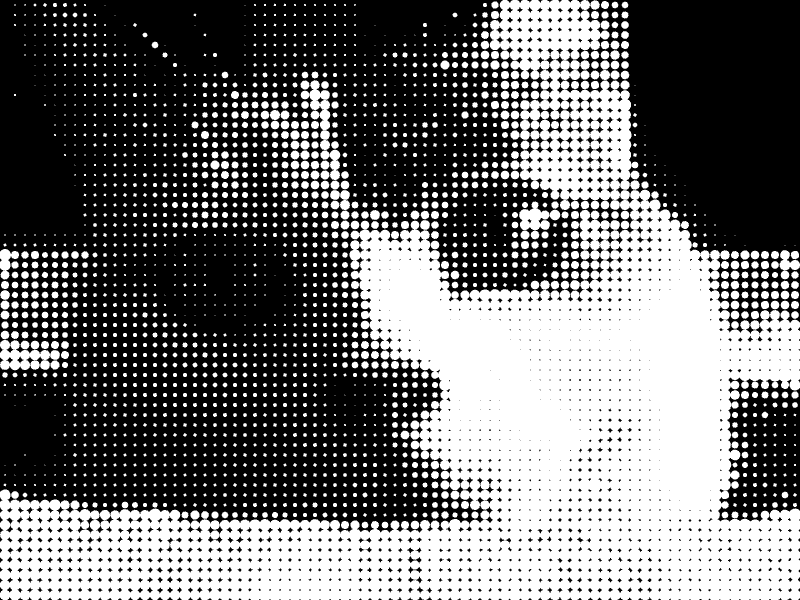
This next step is just begging to happen. Each Particle is going to reference the Channel to see what color gray exists at that Particle's location. It will then set its color to this grayscale value.
We pass in a reference to the Channel and use getValue() to get the value of the Channel at a specific location. We simplified things a bit by making the image the same size as the project window. Otherwise we would have to do some extra work to make sure the image fills the entire app window and that we don't try to access outside of the Channel's dimension. This is something we will address later in the tutorial series.
Now that we have the color, we need to make sure OpenGL knows what color to draw our circle. We add this line to render() before we draw the solid circle.
Now, every single one of our Particles has a new set of instructions to follow.
Step 1) Find out the color from the Channel which corresponds with my current location.
Step 2) Set my color to the returned Channel color.
Step 3) Draw myself
Each of the 4800 Particles goes through this set of instructions every frame. You might be thinking this is overkill. The Particle only needs to find out its color once. This could happen when each Particle is created and then you never need to make the calculation.
This is entirely true. However, in a short while, we will want to animate some of these variables which means we will have to do these calculations every frame anyway. So in general, you should separate your variables and your constants. If a property is not going to change, just define it once and forget about it. However, if you need to animate this property over time, you should do this in the update() method which gets called every frame.
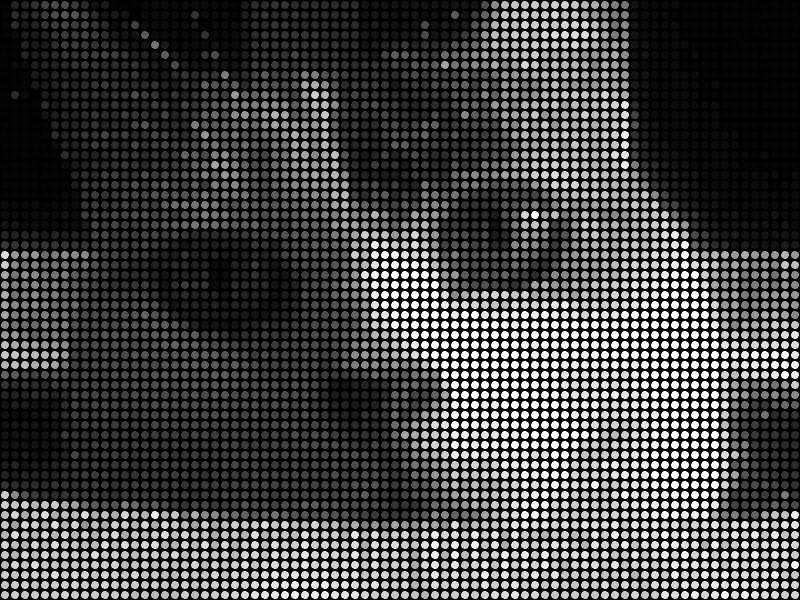
Well, that looks just about like we expected. Nothing special there. How about instead, we adjust each Particle's size and leave the color white. The Particles that should be brighter will be larger than the Particles that should be dark.
This code looks familiar enough. Pass in the reference to a Channel, get the grayscale value at the Particle's position, then set the radius to be equal to that value.
A quick side-note about the demon that is the magic number. In the code above, I know exactly why I wrote 7.0. Since getData() for a Channel32f returns a value from 0.0 to 1.0, I decided I wanted that range to be larger. I arbitrarily chose 7.0.
However, after a couple weeks of being away from the code I wrote, I may not remember why I wrote 7.0 or what that number is even supposed to represent. This doesn't necessarily mean you should replace all numbers with named constants. That would be overkill. Just be aware that when you use constants that are not defined (or at least, described with comments), you are potentially doing something you will regret later, and you are definitely doing something that other coders frown upon. Make an effort to minimize these magic numbers especially if you plan on sharing code with others.
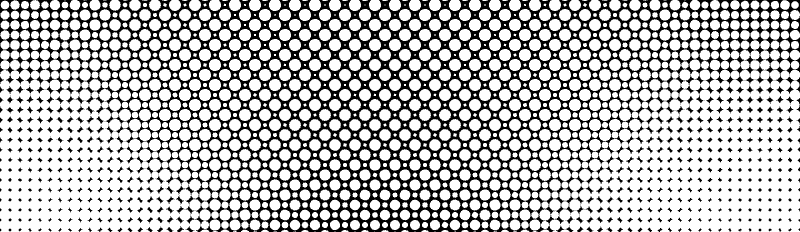
Instead of using 7.0, I have created a member variable called mScale which I initialized to 7.0. No more mystery.
It is time to give the user some control. Chapter 3 will explore some options for user input.