Building a new project
Getting a new project up and running in Cinder is simple. Take a peek at the OS X or Windows guides to creating a new project to see for yourself. However, for this tutorial you can simply follow along from the project source code contained in the cinder/tour folder.
When you create a new Cinder project, you will notice there are a few functions declared for you. Every Cinder project is made up of three main functions. You initialize your variables in the setup() method which is called once when your program begins. You make changes to those variables in the update() method. And finally, you draw() content in your program window. Update and draw are the heartbeat of any Cinder project. Setup, then update and draw, update and draw, update and draw, on and on until you quit the application.
Additionally, you can modify some of the settings using the prepareSettings() method. It is entirely optional and if you choose to leave it out, Cinder will use a default window size of 640x480 with a frame rate of 30. For this tutorial, we want our window to be 800x600 with a frame rate of 60 so we would say:
Another thing to notice up front is that Cinder uses C++ namespaces. Depending on what programming languages you've worked with, you may have already encountered namespaces before. They're nothing fancy - just a way of grouping functions and classes together under a common name. Everything in Cinder is inside the cinder:: namespace. So to reference something inside it, like say, the Timer class, we refer to cinder::Timer. C++ namespaces also support hierarchies, which is a very nice feature that Cinder takes advantage of. So for example, the OpenGL texture class has the full name of cinder::gl::Texture. However this can get a little long-winded sometimes, so Cinder provides a couple of shortcuts. The first is that whenever you would refer to cinder:: you can also refer to its synonym, ci::. These are completely interchangeable, but ci:: is a little easier to type, so we recommend it. Secondly, you'll generally see in the samples the following two lines toward the top:
These using statements are just a shortcut to tell the C++ compiler, “if it's ever unclear, I am talking about namespace whatever, but I am not going to keep typing whatever:: everywhere.” There is a list of the namespaces inside Cinder here.
Now that you understand the basic workings for any Cinder application, feel free to hit Run (or build or whatever button makes it go). You should see a 800x600 pixel window filled with black.
Congratulations. You have just created your new blank canvas: a black expanse filled with potential. It is a single line of code and a perfect place to start. This is how you clear the screen to black in Cinder.
If you are familiar with OpenGL, you will note that this is just a convenience method provided by Cinder. All gl::clear() is doing is wrapping up a few lines of code into one easy to use function. The actual code executed by gl::clear() is shown below.
For example, if you wanted to clear the background to red and also clear the depth buffer, you would write
It is much nicer to just deal with that single line of code instead of needing to write out the full OpenGL syntax to clear the screen. As we continue, we will encounter many other convenience methods. They are entirely optional. If you'd rather write out the whole thing, be our guest.
By the way, Color() is just a class provided by Cinder to help describe and manipulate color data.
Moving along, perhaps you want the background to cycle between white and black. You could make use of getElapsedSeconds(), which will return a float equal to the number of seconds since the app started. The following gray variable oscillates between 0.0 and 1.0.
Animation! Give yourself a pat on the back.
Loading and displaying images
Loading images in C++ can be a chore. Luckily, Cinder does most of the hard work for you. The process for loading and displaying an image can be broken up into only a few lines of code.
1) Tell the compiler we're interested in Cinder's image input/output code and gl Texture code.
You put these lines at the top of the project with the other includes.
2) Declare a new texture in the App class.
This is where you say that you want your app class to have a gl::Texture object and it is going to be called myImage. This line of code goes in the App class declarations.
3) Load an image into the texture you just declared.
Now that you have declared a new gl::Texture object, you need to put some image data into that gl::Texture. There are myriad ways to do this. In this example we are assuming you've got a resource in your application that is a JPEG file called image.jpg. We can load this resource using loadResource(), and we pass the result of that to loadImage(), and in turn construct our gl::Texture with the image that comes back. This line of code would go into your setup() method. (By the way, this is the OS X way of using resources, and the Windows way is just a bit different, but we won't get into the subtleties here. If you would like to take a break and read about how to use and manage resources, check out Using Resources in Cinder).
4) Draw the Texture into the app window.
Finally, you place this line in the draw() function and it will draw the gl::Texture so that it fills the app window. This is another Cinder convenience method. Behind the scenes there are OpenGL calls to create a textured GL_TRIANGLE_STRIP. As we mentioned before, you can write out all the OpenGL yourself if you choose. Either way is fine, but for drawing things like images or circles or other simple forms, it is great to have these one-liner solutions.
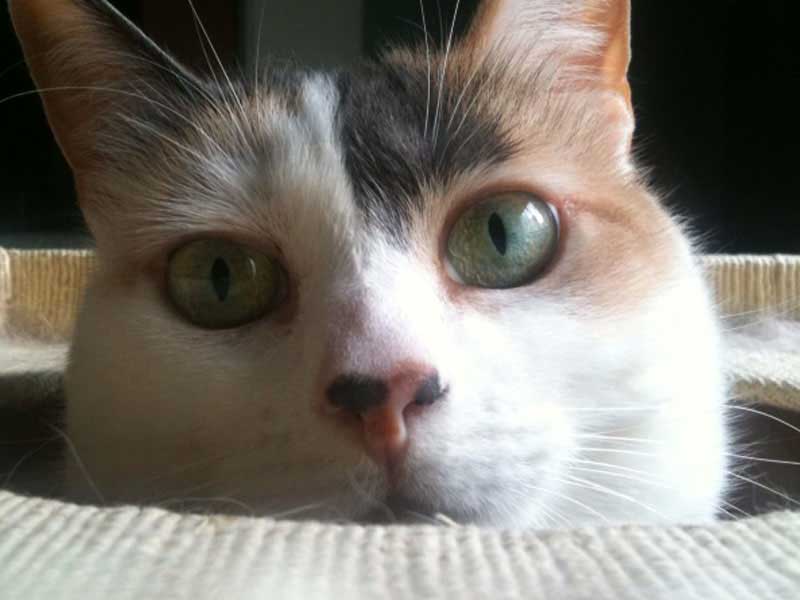
And what does a loaded and drawn image look like? Well, if you use a picture of Paris the kitty, it would look a bit like this.
Other options for dealing with images
As we mentioned before, including images directly in your app as resources is one option, but Cinder makes it easy to load images from many different sources. I'm going to show you two additional ways you can use images in your application without needing to have them stored locally. The first way is to prompt the user to open a file.
The following code will attempt to create an image from a file selected by means of a standard open dialog box. Once you select a file, assuming the file is a valid image, a texture is created. Otherwise, an exception is thrown and we print an error message (we'll discuss console() more in a bit).
Notice the second parameter to getOpenFilePath(), which is the result of ImageIo::getLoadExtensions(). This is a quick way to tell the open dialog, "only the let user pick files whose extensions correspond with the types of images I know how to load."
The second way of getting images into your application is to load them directly from a Url. This is surprisingly easy.
Keep in mind that you should not try to draw the texture until after something has been loaded into it. We should check to make sure myImage is a valid gl::Texture before attempting to use it. We can do this with a simple if statement:
Drawing Shapes
Drawing shapes is just as easy. If you want to draw a circle of a radius of x, you can use gl::drawSolidCircle(). The following line of code will draw a filled circle centered at (15,25) with a radius of 50.
The circle that is created is actually an OpenGL TRIANGLE_FAN. The number of triangles comprising the fan can be controlled by an optional third parameter. If left blank, the circle will be created with as much detail as is needed based on the circle's radius. For example, the following code will create a filled hexagon.
There are similar methods for drawing all manner of basic geometry, both 2D and 3D. Check the reference for the full list.
Not content with a stationary circle? That is easily fixed.
Now we have a circle that moves in a 1 pixel radius trajectory around the origin (0,0). A 1 pixel radius around the origin? What good is that? Well, we are breaking this process down step by step so you can see how to evolve a sketch. If you were to just skip ahead to the final code you miss out on how it was derived.
First, lets put our circle closer to the center of the app window. Right now, the circle is drawn in the upper left corner of the screen (the origin). We can use getWindowWidth() and getWindowHeight() to retrieve the dimensions of the window and add half their respective values to the x and y variables.
We can simplify this further by using getWindowSize(), which returns a Vec2i representing the dimensions of the app window. We can add half of the window size to circle and this will also move it to the middle of the screen.
Now that we have moved our circle to the center of the screen, lets fix the radius of the sine and cosine offset. Currently, our circle is moving but the range of its movement is 2 pixels so it isn't very lively. If you want your circle to move in a 100 pixel radius circular orbit, just multiply the x and y variables by 100.0.
Finally we are going to make the circle's radius change in relation to its x position. Since x spends as much time as a negative number as it does a positive number, we will go ahead and use the absolute value of x.
Creating a basic Particle engine
These last few steps, though tiny, are a great example why we should go ahead and make a class for this circle. If we ever wanted to draw two or more circles, each with their own position, speed, and size, it becomes necessary to package up this data into its own class to make it easier to access each circle individually. We could say circle1 has a position of loc1 with a size of radius1, and then do the same with circle2 and circle3 and so on. However, when you want to start dealing with thousands of circles, it quickly becomes obvious that we should rethink how we are approaching this problem.
First, we will create a controller class. This just makes it easy to segregate Particle-related code. This new class is called ParticleController and as the name suggests, it is in charge of controlling the Particles. It will have its own update() and draw() methods. update() will iterate through all of the Particles and tell each one to run its own personal update() method. After all the Particles are updated, the ParticleController then tells each of the Particles to <a class="el" href="_app_cocoa_touch_8mm.html#a56c5cf8a568cff737ff95520cbe6b405">draw()</a>.
The Particle class is based what we did with the circle above. Each Particle has a position in space, a direction of travel, a speed of travel, a size, and whatever else you want to add to give each Particle its own personality. Later on, we will add a few more variables. Here is a summary of the Particle class code (the full source is contained in cinder/tour/Chapter 1/)
The ParticleController, which we will discuss in a moment, is responsible for creating new Particles. For now, we will also task the ParticleController with saying where the new Particle should be created and we pass that location in the constructor.
The Particle then determines which direction it is traveling, in this case that direction is a random normalized 2D vector, as well as what speed it is traveling. We'll discuss these Rand functions in more detail in the next chapter.
Note: The variables in the Particle class all begin with the letter 'm'. This is just a naming convention to let me know at a glance which variables are member variables. It is a good habit to get into and comes in very handy when the class grows to hundreds of lines of code.
Let's have a peek at ParticleController.h.
Not much to it. The ParticleController::update() method tells all the Particles to update. The ParticleController::draw() method tells all the Particles to draw. And the addParticles() and removeParticles() methods will create or destroy the supplied amount of Particles.
All of the Particles are kept in a list. This is a class built-in to C++ which maintains a linked list of objects. If you're new to C++, you should definitely familiarize yourself with these built-in classes (called the STL) - they are extremely fast and powerful. A nice list and discussion of them is available here. If you want to add a new Particle to the end of the list, you use push_back:
And as you might have guessed, to remove a Particle from the end of the list, you use pop_back(). Eventually you are going to want more control over which Particles to remove. For instance, a Particle moves offscreen and you no longer need it around. You cannot rely on pop_back() because it is highly unlikely that the Particle at the end of the list will also be the one that just moved offscreen. We will solve this problem a little later in the tutorial.
In order to tell each of the Particles in our list to update() or draw(), we use an iterator. The iterator is simply a way to access all the items in a list one by one.
That is just about all we need. All that remains is to add the appropriate ParticleController method calls in the App class and we are done.
After we declare our ParticleController, called mParticleController, we add the following line to the setup() method:
The update() method will look like this:
And finally, the draw() method:
When you build and run the project, you should see 50 white circles appear in random locations and move in random directions.

50? Boring. How about 50,000?
Up next, we are going to add some personality to our Particles. On to Chapter 2.